How to Apply Wall Stickers
Our online guide to installing wall stickers.
The installation process for your wall sticker is quick and easy, transforming your room in minutes.
However, we recommend you watch our installation video before you apply one its comprehensive but covers all the important steps especially for applying large wall stickers.
When you recieve your wall sticker you will receive our instructions leaflet with your wall sticker order, however in case you lose them we have prepared the written instructions below.
Your wall sticker is made up of three components; an application layer, a backing layer and your wall sticker. These sections help you apply your sticker quickly with long lasting results.
Stickers can be installed by one person, however, it may be beneficial for two people to apply larger stickers.
What You’ll Need
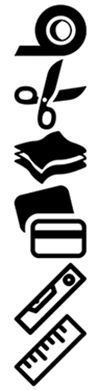
To apply your wall sticker, you’ll need the following kit:
- An applicator or credit card
- Masking tape
- Scissors
- Clean cloth
- Long ruler - Recommended
- Spirit level - Recommended
Before You Start
Before you begin, make sure your wall is clean and free of dust. Use your cloth to wipe away any debris and ensure the surface is smooth and clear. Also, ensure the wall is completely dry before beginning installation.
Unroll your sticker from the packaging and flatten the sticker. Make sure it's error-free and you’re happy with the design before installation.
Stickers will be sent cut-to-size, however, if you want to move any individual sections of larger stickers around, please use a pair of scissors to cut out any sections.
Installation Process
Step 1
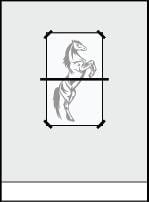
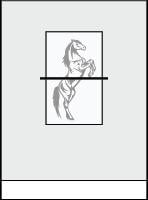
Use masking tape to stick the sticker to your wall in all four corners. Then, add a strip of masking tape across the middle of your sticker to create an anchor point. Apply vertically or horizontally to suit the shape of your sticker.
Step 2
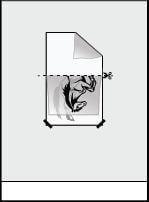
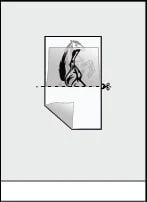
Remove the tape from the top two corners and begin to peel off the backing layer to the anchor point. When you've reached the central masking tape, cut the backing layer of the top half away and apply the sticker to the wall.
Step 3
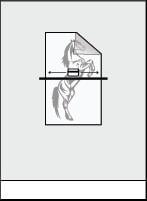
Use your credit card or applicator to remove any air bubbles from the sticker. Work from the middle of the sticker to the edge. Make sure the sticker is pressed down hard on the wall.
Step 4
Leave the sticker for a few minutes to settle on the wall.
Step 5
Remove the masking tape from the rest of the sticker and repeat the second and third steps
Step 6
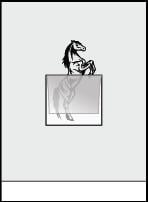
Slowly remove the application layer leaving the sticker on the wall. If sticker comes away with the application layer, re-apply the layer and press down hard.
General Hints and Tips
- Avoid applying a sticker directly above a heat source
- Take your time, especially when peeling off the backing sheet and applicator
- We recommend waiting a minimum of three weeks after a wall is painted before installation
- Smaller sticker can be installed by a single person without masking tape
- If air bubbles occur that you’re struggling to remove, use a pin to create a small pin-prick hole to let the air escape. You should then smooth out the sticker
If you’re struggling with the installation of your wall sticker, please watch our helpful video at the top of this page.
Our expert team is also available by phone, email or live chat for further advice and support through the installation process.